Friday, May 25, 2012

Homemade Pappardelle Pasta with Asparagus, Red Pepper and Eggplant and Tomato Sauce


Now I know why pappardelle pasta is so popular in Italy where they actually have festivals honouring this close cousin to the fettuccine. Pappardelle are much broader, cut into strands up to an inch in width. They are visually beautiful, resembling wide satin ribbons, wrapping all the luscious ingredients from your favourite sauce.
Traditionally, pappardelle are served with a rich thick braised meat sauce or 'ragu'. For my homemade pappardelle, I went with a lighter primavera type sauce. Not only is it a healthier version but also a time saver. You do not  need to labour for hours with my easy to make asparagus, red pepper, eggplant and cherry tomato sauce.  It is an ideal vegan, vegetarian friendly pasta dish, yet sure to please all the meat lovers out there.


Preparation:
Ingredients:
Pappardelle pasta  (cooked al dente in salted boiling water and drained)
1/2 cup or more pasta water ( reserved water used for cooking the pasta)
extra virgin oil
1 onion chopped
1 red pepper diced
1 cup peeled and diced eggplant
1 garlic clove finely minced
1 lb fresh asparagus (cut into pieces)
3 cups cherry tomatoes
1 tomato chopped
grated Parmigiano-Reggiano cheese 
Salt and pepper to taste
chili flakes (optional)

In a skillet pour a generous amount (3-4 tablespoons) of extra virgin oil. Heat the oil and add the onions. Allow the onions to become a golden colour. Add the diced eggplant and continue cooking for 4-5 minutes to enhance the flavours. You may have to add more oil as the eggplant  tend to absorb it. Stir in the red peppers, asparagus pieces and chopped garlic ( you can add some chili flakes for a spicier sauce). Saute for 2-3 minutes. Toss in the cherry tomatoes. Stir and add about 1/2 cup of reserved pasta water. Continue cooking until the tomatoes are soft. If needed add more pasta water. Toss in the the drained pasta which has been cooked al dente in salted boiling water. The pasta will absorb some of the sauce as you continue cooking for a minute or two. Grate the desired amount of parmigiano cheese. Serves 4 or more.


I know that the idea of making homemade pasta for the first time can be intimidating for many of us.  Once you conquer your fears, I guarantee that you will get hooked on making homemade pasta. I've provided a step by step photo tutorial to help guide you through the process. 
Nothing compares to homemade pasta. The added bonus is that it freezes will so you can have some on hand for those last minute meals. Just make sure to let it dry slightly and use parchment paper to separate the layers of pasta when freezing in your plastic containers. The pasta will keep for several months...if it lasts long enough .


Homemade Pappardelle Pasta:

4 Cups of all purpose flour
6 large eggs


Place the flour on a clean surface (a counter or large wooden board). Make a well in the center of the flour. Break the eggs into the well and lightly beat with a fork.


Start incorporating the flour a little at a time. Continue blending in the flour with your fingertips. The amount of flour used will depend on the size of eggs and humidity. You may not need all the flour.
Remove excess flour from the work surface and start kneading your dough on this lightly floured area. Knead for about 10 minutes, until smooth and elastic.


Make a disk with the dough.
Wrap the dough in plastic wrap and let stand for at least 30 minutes or more.


Roll out the dough into a 9 inch disk and cut into 6 pieces. I start my machine at #6 and roll each piece. I then lower it to #4 and roll the dough pieces once again. Continue this process until #1, which will give you a thin dough. Roll the strip of dough into a cylinder and cut 3/4" to 1" strips.


Place the strips on a clean cloth or a work surface light dusted with flour and allow to dry before cooking in salted boiling water.  The pasta also freezes well for later use.


Saturday, May 19, 2012

Fusilli Pasta with Broccoli Red Pepper and Pine Nuts


 Are you looking for a healthy vegetarian and vegan friendly pasta dish? I would love to share my super easy fusilli pasta recipe with  broccoli, red pepper and pine nuts. My step-by step recipe with accompanying photos will guide you. In just under 30 minutes, you will have a delicious pasta dish to rival any restaurant's but for a fraction of the cost.

Ingredients:
1/2 lb (250 grams) fusilli pasta
4 tablespoons extra virgin oil
1 onion chopped
1 sweet red pepper diced
2 garlic cloves finely chopped
4 large tomatoes diced
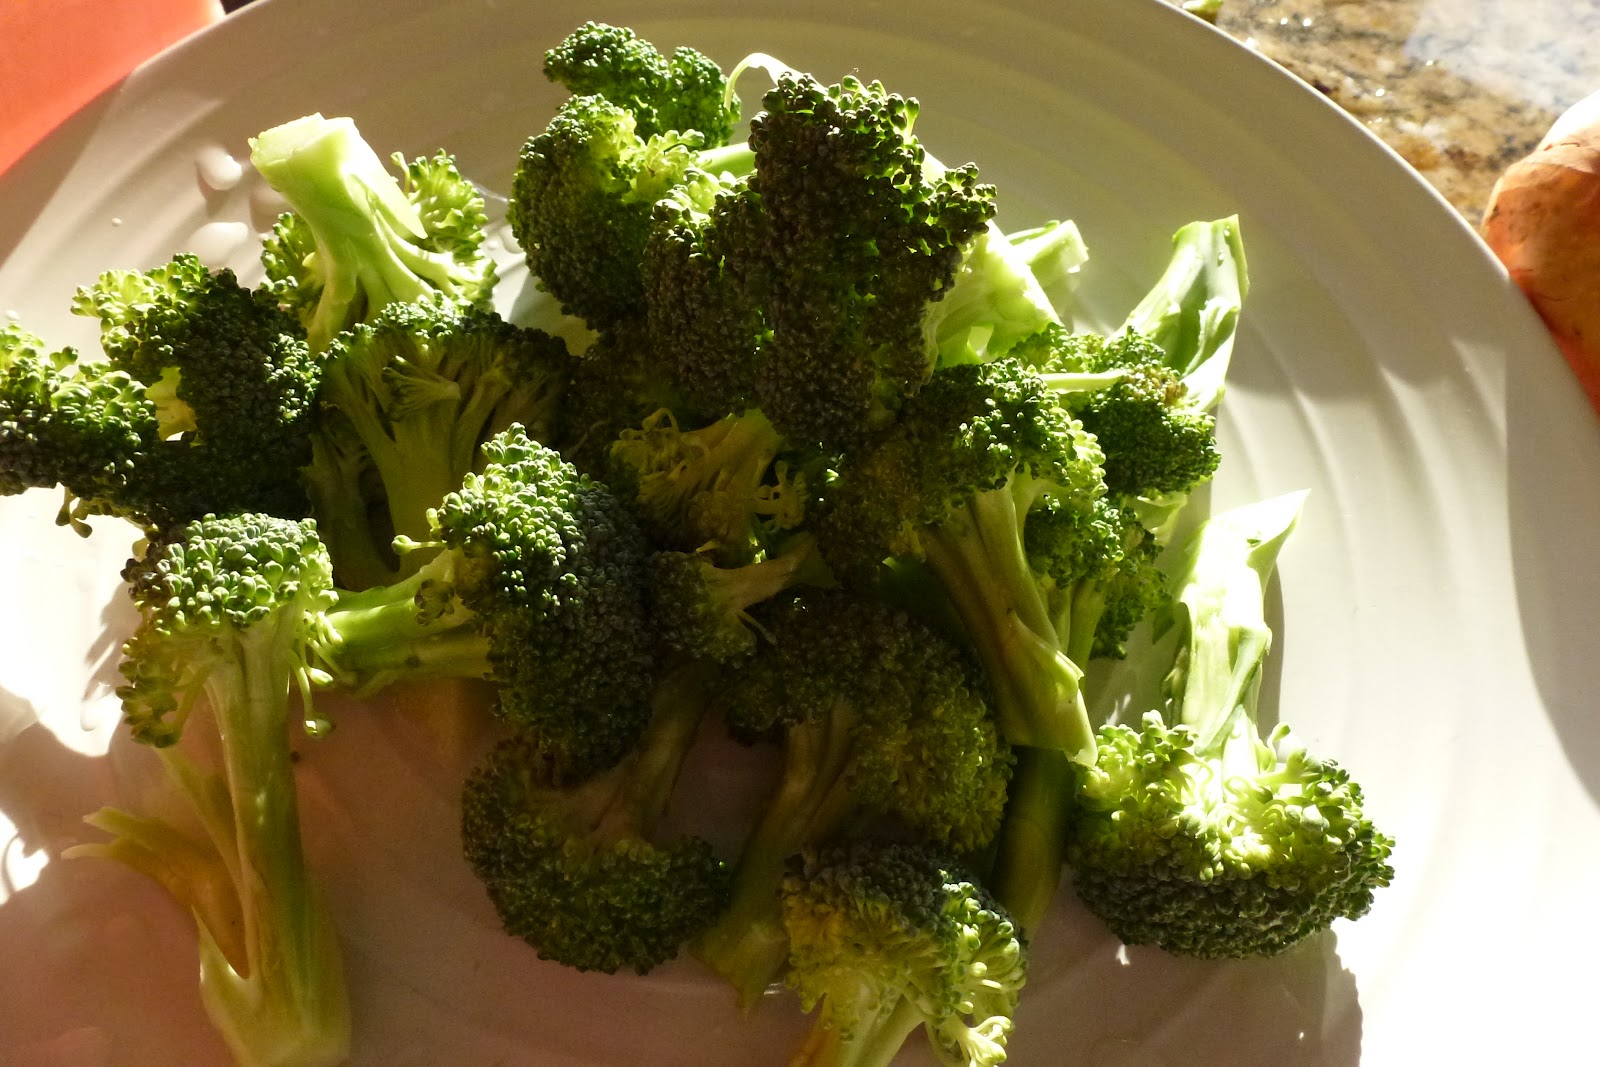
4 cups broccoli florets
1/4 cup toasted pine nuts
grated Parmigiano-Reggiano cheese
1/4 chopped Italian parsley
salt and pepper 


PREPARATION:

A In a small frying pan toast the pine nuts. Set aside.


In a pot bring water to boil for the pasta. Salt the water. Cook the pasta for 9 minutes.


Add the broccoli. Cook for an additional 3 minutes, until the pasta and broccoli are al dente. Strain the pasta and broccoli, reserving some of the pasta water.

While the water is boiling for the pasta, begin the tomato sauce. The time needed for the pasta to cook might vary,depending on the brand. The De Cecco Fusilli pasta will take approximately 12 minutes to cook al dente.


In a deep skillet or frying pan, heat the oil and add the chopped onions. Season with salt and pepper. 
Saute the onions for about 5 minutes. Stir in the chopped red pepper and garlic. Continue cooking for 3 minutes.
 

Stir in the chopped tomatoes  
 Continue cooking for an additional 10 minutes
Toss in the pasta and broccoli. Add some of the pasta water. This will help stretch and add flavour to the sauce.
Stir in the grated Parmesan cheese
 and the pine nuts

Transfer to serving bowl. Drizzle a small of extra virgin oil on the pasta and sprinkle on the chopped parsley.


Wednesday, May 16, 2012

Rosemary Cheese Crackers


If you love crispy melt in your mouth shortbread cookies, you are going to flip for these savoury rosemary cheese crackers.  Simple to make, they are bound to impress served with a glass of wine or your favourite cocktail.  These rosemary cheese crackers, wrapped in a pretty box will also make the ideal hostess gift and for a fraction of the cost to those found in specialty shops.


Ingredients:
1 1/4 cups all purpose flour
zest of one lemon
1 1/2 teaspoons dried rosemary (not ground)
1/2 teaspoon salt
1/2 teaspoon pepper
1/2 cup cold butter (cut in pieces)
2 teaspoons lemon juice
4 teaspoons cold water
1 1/2 cups Regianno Parmigiano cheese, grated

In a food processor add the flour, grated cheese, rosemary, lemon zest, salt and pepper. Pulse to blend. Add the butter pieces and pulse until it is the consistency of coarse cornmeal.
Transfer to a mixing bowl and pour in the water and lemon juice. Mix with a wooden spoon to combine. Transfer to a lightly floured work surface and knead into a ball.
Form into a round 1 1/2 inch log. Place the dough on plastic or parchment paper and roll  it up.
Refrigerate for 40 minutes or more.
Cut into 1/8 inch disks and place them on a parchment paper lined cookie tray.
Bake in preheated 350º F oven for 10-12 minutes until golden brown.
Makes about 50 crackers

Sunday, May 13, 2012

Dark Chocolate Cherry Almond Scones in Minutes


To all the mothers out there I would like to wish you a Happy Mother's day!  To help celebrate the special day, you might like to treat your mom to breakfast in bed with these dark chocolate cherry almond scones recipe. In fact, if you have a food processor you can have them ready for the oven in a matter of minutes.

Dark Chocolate Cherry Almond Scones
2 cups all purpose flour
4 teaspoons baking powder
2 tablespoons sugar
1/2 teaspoon salt
1/2 cup cold butter cut into small pieces
1/2 cup dried cherries
1/2 cup toasted sliced almond
1/2 cup coarsely chopped dark Belgian chocolate
1/2 cup sour cream
2 eggs
1 teaspoon vanilla
1/4 cup sliced almond
turbinado sugar
 
In a food processor add the flour, baking powder, sugar and salt.  Pulse, to blend the dry ingredients.  Add the butter and process until the texture of coarse meal. Transfer to a large mixing bowl and gently toss in the dried cherries, sliced toasted almonds and chocolate pieces.  In a separate bowl beat the eggs and vanilla with the sour cream.  Make a well in the dry ingredients and add the egg mixture.  Mix gently to combine with a wooden spoon.  Transfer to a work surface and pat with your hand to a thick disk.  Place the dough on a tray which has been lined with parchment paper.  Roll out the dough to about 1/2” thickness.  Cut into 8 wedges and using a spatula separate them, so as to bake them 2" apart. Sprinkle the turbinado sugar and almonds on top of each scone.  Bake in a pre-heated 400º F oven for 12-15 minutes.  Makes 8 large scones. Serve with butter or your favourite jam.

Friday, May 11, 2012

Foodista Featured Blogger of The Day Community...Mango Strawberry Fruit Flan


Foodista Food Blog of the Day Badge 

You cannot imagine my surprise as I opened my email this afternoon. Alisa, from the Foodista site, wrote to tell me that my  Mango Strawberry Fruit Flan recipe post will be featured on the Foodista homepage, as the Foodista Featured Blogger of The Day  on Wednesday, May 16, 2012. Unable to add the badge they provided for my blog's sidebar (blogspot.com kept spitting up my gadget entry), I decided to take things into my own hands by entering this post to express my humble gratitude to the people at the Foodista.com http://www.foodista.com


Monday, May 7, 2012

Orange Nut Quick Bread


Looking for a good nut quick bread recipe? Well I would love to share mine with you. The orange nut quick bread that I've been baking for years comes from my old tattered Five Roses Flour recipe book, one of the first ones I used when I started baking. For my friends in other countries, Five Roses is simply a brand of flour sold in Canada. In fact the neon Five Roses Flour's sign, a Montreal landmark which was erected in 1948, still greets visitors as they enter our 
fair city. 
  .Montreal At Night Farine Five Roses 


Note: Top off the orange nut bread loaf with an easy to make orange glaze (recipe follows).
You might also like to try molds other than the traditional loaf pan.

According to Wikipedia, "Quick Bread"possibly originated from the United States of America at the end of the eighteenth century. Before the creation of Quick bread, baked goods were leavened with either yeast or by mixing dough with eggs. In order to respond to increased demands for baked goods during the American Civil War, baking soda was used as a leavening agent to provide more rapid results and therefore the creation of 'quick bread'.


Preparation

Orange Glaze:
juice of half an orange
1/4 cup granulated sugar
In a small bowl mix the the orange juice and sugar


Orange Nut Loaf:
1 3/4 cups all-purpose flour
1 1/2 tsp baking powder
1 tsp salt
1/4 cup butter
3/4 cup sugar
2 eggs
2 tsp orange rind
1/2 cup milk
1/2 cup chopped pecans

Pre-heat the oven to 350º F. Grease and flour an 8 ½ “x 4½" x 2½ " loaf pan
In a mixing bowl, blend the flour, baking powder and salt.
In a separate bowl; cream the butter and gradually beat in the sugar.
Beat the eggs into the butter/sugar mixture. Stir in the orange rind.
Add the dry ingredients alternately with the milk to the egg butter mixture. Mix well after each addition.
Fold in the nuts.
Pour into the prepared loaf pan and bake for 50-60 minutes. Brush on the orange glaze. Return the loaf to the oven for and additional minute.
Allow to cool for about ten minutes before transferring to a wire rack for further cooling.


Wednesday, May 2, 2012

Mango Strawberry Fruit Flan with Crème Pâtissière Filling


My strawberry mango fruit flan with creamy custard filling is a great way to celebrate the warmer weather ahead. No need to tackle piecrust dough with this super easy sponge cake recipe. The orange liqueur syrup, brushed on the cake after baking, guarantees a moist interior and flavourful base for the luscious crème pâtissière. I decided to bring the custard filling up a notch by adding a dash or two of vanilla scented Galliano liquere. The crème pâtissière is then topped off with refreshing strawberries, mango, and clementine slices. A simple peach glaze is the crowning glory, making the fruit glisten and a treat for the eyes.


Sponge Cake Base:
1/2 cup all-purpose flour
1 cup cornstarch
1 cup sugar
9 tablespoons melted butter
2 teaspoons baking powder
4 eggs

Preheat the oven to 350º F.  Grease and flour a 10" flan pan. Sift the flour, cornstarch, and baking powder into a large mixing. In a separate bowl beat 4 eggs and the melted butter. Add the wet ingredients to the dry ingredients. Mix with a wooden spoon until blended. Pour into the prepared pan and bake for 30 minutes.

Note: The original recipe calls for 1/4 cup of all-purpose flour, 1/2 cup cornstarch, 1/2 cup sugar, 2 teaspoons baking powder, 4 1/2 tablespoons melted butter,and only 2 eggs. Given that I like to use a large tart tin and prefer a thicker cake base (about 2 inches high), the recipe is doubled.

Simple Syrup:
1/2 cup water
1/2 cup sugar
2 tablespoons orange liqueur (optional)

In a saucepan, bring to boil the sugar and water. When the sugar is dissolved, remove from the heat and stir in the liqueur.
 
Crème Pâtissière:
2 cups whole milk
1 vanilla bean
4 large egg yolks
1/2 cup sugar
1/2 cup all-purpose flour
2 tablespoons Galliano liqueur or liqueur of choice (optional) 
1 tablespoon butter

Pour the milk and vanilla into a saucepan and heat to just below the boiling point. Remove from the heat and let stand for 15 minutes to allow the vanilla flavour to infuse. Strain the milk and reheat.
In a mixing bowl, whisk the egg yolks and sugar until pale and thick. Whisk in the flour until well incorporated into the wet ingredients. Gradually whisk in the hot milk until blended.
Transfer to a heavy-based saucepan and whisk continuously, over medium heat until the custard thickens and begins to boil. Simmer and continue whisking for an additional two minutes to allow the flour to cook. Remove from the heat and blend in the butter. Whisk in the Galliano liqueur or liqueur of choice if desired.
Transfer to a bowl and place a piece of plastic wrap directly on the surface of the custard to prevent a film from forming.

Note: Normally, the knob of butter is rubbed on the surface of the cooked custard to prevent a skin from forming. I prefer using the plastic wrap for that purpose and integrate the butter into  the custard for extra flavour. I feel it also gives a much smoother finish to the custard.
The recipe makes more than enough to cover the cake surface. I ended having about half a cup of the crème pâtissière leftover.


Peach and Liqueur Glaze:
1/2 cup peach jam
3 teaspoons Triple Sec liqueur or other orange liqueur
In a small saucepan, heat the jam until melted. Turn off the heat and stir in the liqueur.

Note: I did not strain the glaze, opting to have the pieces of peaches as part of the topping.

Assembly:
Place the sponge cake on a serving platter and brush the surface with the peach syrup.
Gently spread the crème pâtissière on the surface of the cake. Decorate the top with the strawberries, mangoes and clementine pieces. Brush or drizzle with the liqueur peach glaze.